Mastering Spectral Balance When Mixing in Logic Pro:
One of the most important concepts in mixing is spectral balance—ensuring that all frequency ranges in your mix are well-represented without clashing or overcrowding. Logic Pro, with its robust built-in tools, is an excellent DAW for tackling spectral balance, offering everything you need to craft a clear, balanced mix. In this blog post, I’ll break down what spectral balance is, why it matters for dance music, and how to achieve it using Logic Pro’s features as of May 13, 2025. Let’s dive in and make your mixes shine!
What Is Spectral Balance?
Spectral balance refers to the even distribution of energy across the frequency spectrum in your mix, ensuring no single range—lows, mids, or highs—dominates or gets buried. In dance music, where elements like kicks, basslines, synths, hi-hats, and vocals need to coexist, spectral balance is key to creating a mix that’s both powerful and clear. A spectrally balanced mix will:
Sound Full: Low frequencies provide weight, mids offer clarity, and highs add air and sparkle.
Avoid Clashes: Elements like the kick and bass don’t overpower each other, and vocals remain intelligible over synths.
Translate Well: The mix sounds consistent across different playback systems, from club speakers to earbuds.
Without spectral balance, your mix might sound muddy (too much low-mid energy), harsh (overemphasized highs), or thin (lacking low-end power)—all of which can ruin the impact of a dance track.
Why Spectral Balance Matters in Dance Music
In genres like house, techno, and drum and bass, spectral balance is particularly important because of the dense, layered nature of the arrangements. A typical dance track might include:
Kick and Bass: Dominating the low end (50-250 Hz), these elements need space to provide the track’s driving force.
Hi-Hats and Cymbals: Living in the high end (5-12 kHz), they add rhythm and energy but can become harsh if overdone.
Synths and Pads: Often occupying the midrange (500 Hz-4 kHz), they need clarity to shine without clashing with vocals.
Vocals: Sitting in the mid-to-high range (1-5 kHz), vocals must remain intelligible amidst the instrumentation.
A lack of spectral balance can lead to a kick that masks the bass, hi-hats that drown out vocals, or synths that sound muddy—issues that can make your track feel unprofessional in a club setting.
How to Achieve Spectral Balance in Logic Pro: A Step-by-Step Guide
Logic Pro offers a suite of powerful tools to help you achieve spectral balance, including its stock EQ, analyzers, and plugins. Here’s a beginner-friendly guide to balancing your mix, using a typical dance music project as an example.
Step 1: Analyze Your Mix with Logic Pro’s Multimeter
Tool: Logic Pro’s Multimeter (under Audio FX > Metering).
What to Do: Insert Multimeter on your master bus to analyze the frequency spectrum of your entire mix.
What to Look For: The Multimeter’s Analyzer tab shows a real-time frequency spectrum. Aim for a gentle slope—stronger in the low end (50-200 Hz), tapering off toward the highs (10-20 kHz). Spikes or dips indicate problem areas (e.g., a spike at 300 Hz might mean muddiness).
Tip: Compare your mix to a reference track (e.g., a house track by Fred again..). Logic Pro’s Match EQ (under Audio FX > EQ) can analyze the spectrum of your reference and apply it to your mix as a starting point.
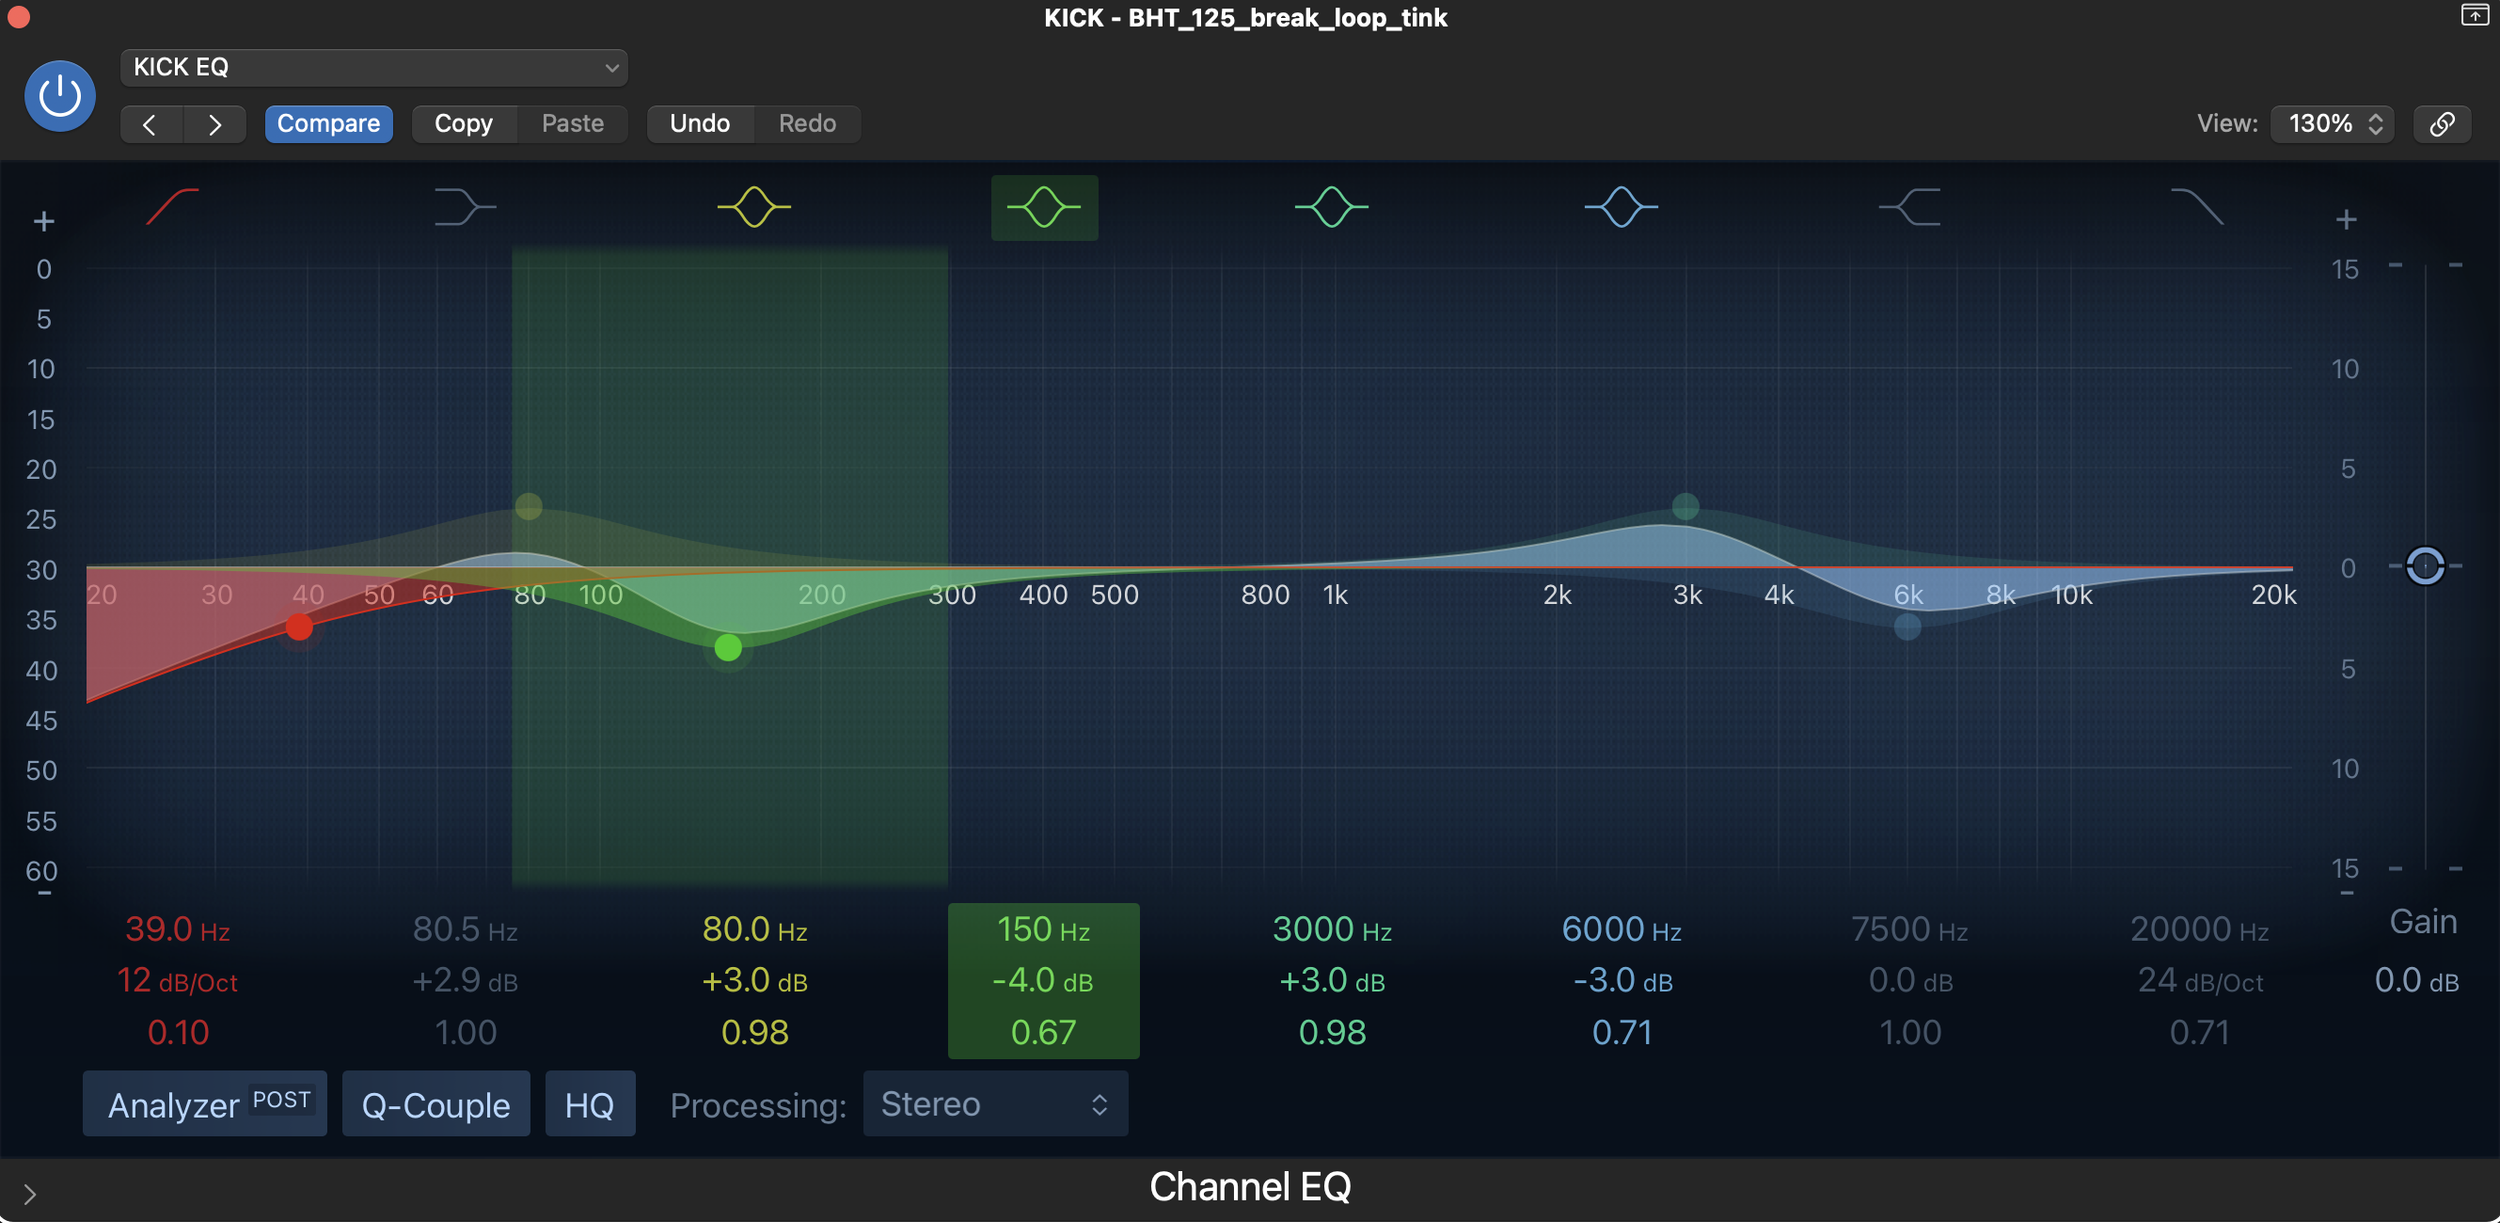
Step 2: Carve Space with Channel EQ
Tool: Logic Pro’s Channel EQ (under Audio FX > EQ).
Low-End Balance (Kick and Bass):
On the kick, use a high-pass filter to cut below 30 Hz (subsonic rumble) and boost slightly at 80-100 Hz for punch.
On the bass, cut slightly at 80-100 Hz to make room for the kick, and boost at 200-300 Hz for warmth.
Use sidechain compression (Logic’s Compressor with sidechain enabled) to duck the bass when the kick hits, ensuring clarity.
Midrange Clarity (Synths and Vocals):
On synths, cut around 300-500 Hz to reduce muddiness, and boost at 2-3 kHz for presence.
On vocals, cut around 200-400 Hz to avoid boxiness, and boost at 3-5 kHz for clarity. If vocals clash with synths, notch out 2-3 kHz on the synths.
High-End Sparkle (Hi-Hats and Cymbals):
On hi-hats, use a high-pass filter to cut below 500 Hz, and boost at 6-8 kHz for crispness. Cut at 4-5 kHz if they sound harsh.
Be cautious with boosts above 10 kHz to avoid ear fatigue.
Step 3: Use Logic Pro’s EQ Visualizer for Precision
Tool: Channel EQ’s built-in Analyzer (toggle the “Analyzer” button).
What to Do: Enable the Analyzer while EQing individual tracks to see their frequency content in real time. This helps you identify overlapping frequencies (e.g., a synth and vocal both peaking at 2 kHz) and make precise cuts or boosts.
Tip: Use a narrow Q (around 2-4) for cuts to remove specific problem frequencies, and a wider Q (0.5-1) for boosts to enhance a range naturally.
Step 4: Balance Levels with Logic Pro’s Gain Plugin
Tool: Logic Pro’s Gain (under Audio FX > Utility).
What to Do: After EQing, use the Gain plugin to adjust the output level of each track. EQ cuts or boosts can change a track’s perceived loudness, so rebalance to ensure elements like the kick, bass, and vocals sit at the right volume in the mix.
Tip: Aim for a rough mix where the kick peaks at -6 dB on the master bus, leaving headroom for other elements.
Step 5: Fine-Tune with Logic Pro’s Vintage EQs for Character
Tool: Logic Pro’s Vintage EQ Collection (under Audio FX > EQ).
What to Do: For a touch of analog warmth, use the Vintage Graphic EQ or Vintage Tube EQ on elements like synths or vocals. For example, a slight boost at 3 kHz on the Vintage Tube EQ can add a smooth, musical presence to vocals, enhancing their place in the mix.
Tip: Use sparingly—too much EQ color can skew your spectral balance.
Step 6: Check Stereo Imaging with Logic Pro’s Direction Mixer
Tool: Logic Pro’s Direction Mixer (under Audio FX > Imaging).
What to Do: Use the Direction Mixer to adjust the stereo width of elements like hi-hats or synth pads. Narrow the low end (e.g., kick and bass below 150 Hz) to keep it centered, and widen the highs (e.g., hi-hats above 5 kHz) for a spacious feel.
Tip: Over-widening can cause phase issues—use Logic’s Correlation Meter (in Multimeter) to ensure your mix stays mono-compatible for club systems.
Step 7: Final Check with Logic Pro’s Loudness Meter
Tool: Logic Pro’s Loudness Meter (under Audio FX > Metering).
What to Do: Insert Loudness Meter on your master bus to measure integrated LUFS (Loudness Units Full Scale). Aim for -14 to -10 LUFS for a balanced mix that’s loud enough for streaming but not overly compressed.
Tip: If certain frequencies still dominate, revisit your EQ adjustments or use dynamic EQ (like Logic’s Multipressor) to tame specific ranges.
Tips for Achieving Spectral Balance in Logic Pro
Reference Tracks Are Key: Import a professional dance track into Logic Pro and use Multimeter or Match EQ to compare its spectral balance to yours. This helps you identify areas where your mix might be lacking or overdone.
EQ in Context: Always EQ while listening to the full mix, not in solo. A hi-hat might sound great on its own but clash with vocals in the mix.
Use Subtractive EQ First: Cut problem frequencies (e.g., mud at 300 Hz) before boosting to enhance (e.g., presence at 3 kHz). This keeps your mix clean and prevents frequency buildup.
Monitor at Different Volumes: Logic Pro’s Gain plugin on the master bus can help you test your mix at various levels. A spectrally balanced mix should sound good at both low and high volumes.
Take Breaks: Ear fatigue can skew your perception of spectral balance. Take a 10-minute break every hour to reset your ears, especially when working on high-frequency elements like hi-hats.
Practical Applications for Dance Music Producers
Spectral balance is especially critical in dance music, where clarity and impact are non-negotiable. A balanced mix ensures:
Powerful Low End: Your kick and bass drive the track without overpowering other elements, perfect for club systems.
Clear Mids: Synths and vocals remain intelligible, maintaining the emotional connection with listeners.
Sparkling Highs: Hi-hats and cymbals add energy and rhythm without causing ear fatigue, crucial for long DJ sets.
Logic Pro’s tools—like Channel EQ, Multimeter, and Direction Mixer—make it easy to achieve this balance, giving you a professional sound without needing expensive third-party plugins.
Final Thoughts
Achieving spectral balance when mixing in Logic Pro is a game-changer for dance music producers, helping you create tracks that sound clear, powerful, and professional. By using Logic Pro’s built-in tools to analyze, EQ, and balance your mix, you can ensure every element—from the kick to the vocals—has its place in the frequency spectrum. Practice these steps on your own tracks, and don’t be afraid to experiment with Logic Pro’s Vintage EQs or Dynamic Mixer to add character to your mix.
Ready to take your mixing skills to the next level? Share your favorite Logic Pro mixing tips in the comments